基于Proteus的ARM7 LPC21XX学习笔记二、在Realview MDK 4.12下新建一个项目文件
1、Realview MDK 4.12软件的下载、安装、注册(略过不谈)
2、打开Realview MDK 4.12,界面如下图所示

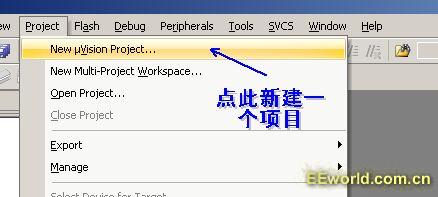
3、开始新项目的建立,鼠标单击“Project”菜单项,选择“New uvision Project...”选项,如下图
4、弹出如下图所示的对话框,选择新建项目的保存路径、项目名称等,在这里建议为每一个项目单独建立一个文件夹,这样便于以后的管理和维护。

5、点击“保存”按钮后,会自动弹出如同下图所示的对话框,提示我们要选择所用的芯片型号,在这里选择LPC2124,然后单击OK,进入下一步。

6、这时再次自动弹出一个对话框,如下图所示。这个对话框时提示我们是否自动添加启动代码,对于我这样的新手来说,当然是选择自动添加启动文件了,点击“是”,进入下一步。

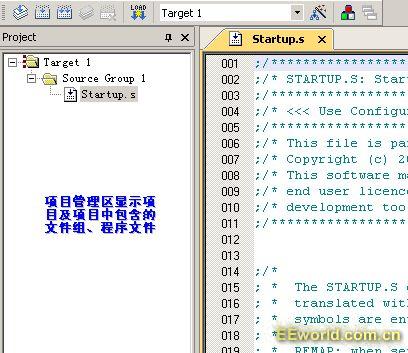
7、这是在项目管理区就出现了我们刚刚建立的这个项目。如下图所示,
8、但是这个项目名字是软件自动命名的“target 1”,感觉很不明确,怎么办?
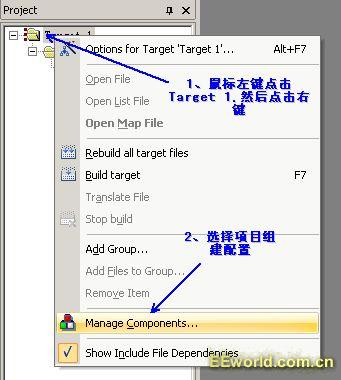
real view MDK也允许我们命名适合自己的项目名称等,如下图所示。鼠标左键选中“Target 1”,然后点击鼠标右键,选择项目组管理选项。
9、如下图所示,我们可以对项目名称、项目中包含的文件组、源代码文件进行重命名以及整理。

10、下图是修改好的项目以及项目中的文件组的名称。

11、接下来就要选择编译器了,如下图所示,

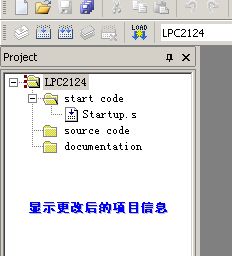
12、下图是更改后的项目信息
13、接下来新建一个源代码文件,如下图所示

14、输入源代码后,将该文件保存为.c类型的文件,按照下图所示步骤操作

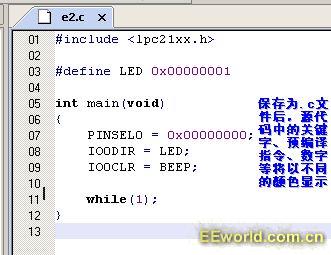
15、源代码文件被保存为.c文件后,程序代码中的关键字,预编译命令、数字等信息将以不同颜色显示,这样看起来就比较清晰了,如下图所示
16、接下来将刚才编写的程序文件添加到项目组中,如下图所示,将该文件添加到source code文件夹中,

17、按照下图进行操作,完成程序文件的添加,需要注意的是,添加一个文件后,文件添加对话框并不会自动消失,这样我们可以继续添加文件,直至添加完毕,然后单击对话框中的”close“按钮,关闭该对话框。

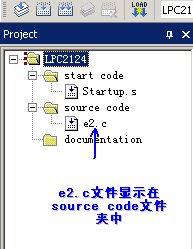
18、添加程序文件后,在项目管理区可以看到添加的文件在那个文件夹下面,如下图所示
19、项目建立了,程序文件也添加进来了,下面就要对这个项目进行编译设置,如下图所示

20、按照下面图示步骤进行设置


21、其余设置按照默认设置即可。完成上面的步骤后,就可以对项目进行编译了,如下图所示,进行编译

22、编译结果如下图所示,提示有错误

23、找到错误所在位置,并改正错误,再次编译,如下图所示

24、编译成功后,我们可以在项目所在文件夹中找到生成的,hex可执行文件,如下图所示